This walk thru goes thru reserving an IP on a specific brand of router. Some of the concepts likely will carry over to different routing software. I hope it’s somewhat easy to follow as I ended up writing more for this Walk Thru beyond what I intend for Walk Thru to be – a simple straight to the point how to do the thing.
Reserving an IP on a router means that the router will now only assign the IP to the device in question. Device will typically be identified by the MAC address, a user provided name, and the specified IP we wish the router to assign every time a device with that MAC connects to it. If a router does not allow directly reserving an IP like this, a similar effect can be done by ensuring the DHCP address range(s) said router hands out do not have the desired ‘reserved’ IP address in its range. For example, if my router’s DHCP address range is 192.164.0.0 – 192.164.0.200, I can effectively achieve reserving an IP for a device by assigning a static address to my device outside of that range – for example 192.164.0.240.
Step 1: Log into the router’s administration page.
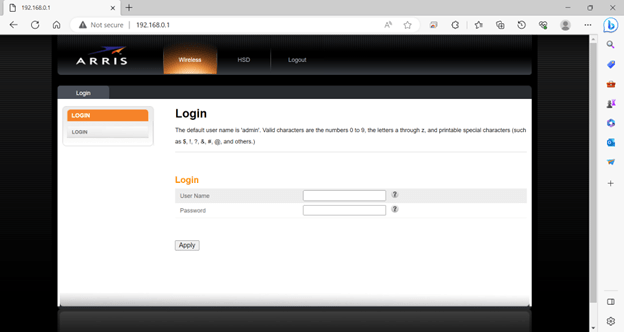
The first step would be logging into the router’s administration console. A consumer level router typically will let this be going via a browser such as Edge or Chrome. Once I point my browser to the router’s IP – in this case 192.168.0.1, I’m presented a login screen. For this router, I’ll need both a username and a password to login. Once both a correct username and password are entered, all that’s left is click the Apply button located below the Password textbox to login.
The screenshot below shows the login page for an Arris brand router and is being displayed over an http connection. The lack of http(s) means devices can see the information transmitted in this connection; however, that is a risk I’m willing to take with this router. If your router supports it, setup HTTPS and disable letting it accept logins from outside the network. Describing how to do this is outside the posts scope.
Step 2: Welcome to the System Setup page.
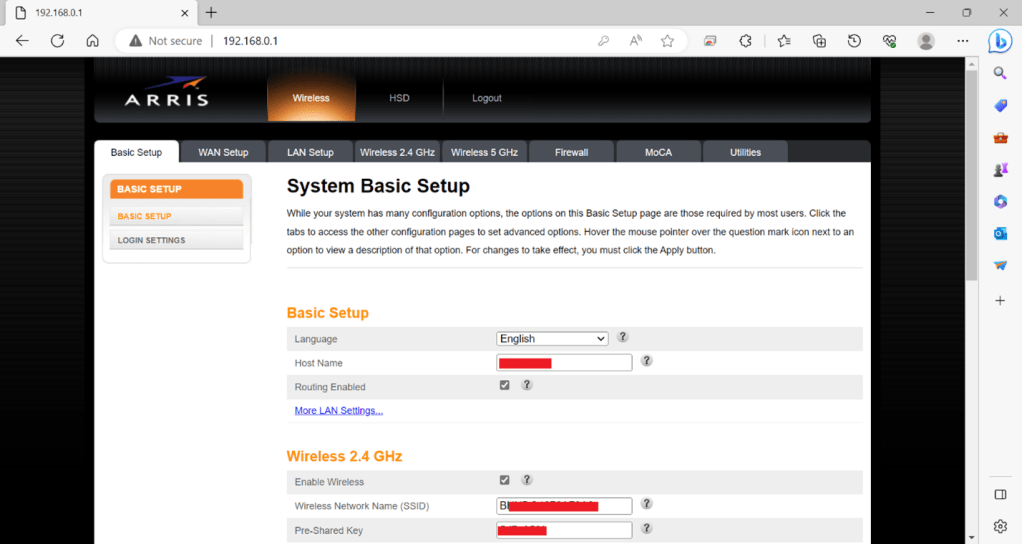
For this Arris router, this is the first page one lands on after logging it. I’ve applied a bit of censorship in the form of a red square blocking things that I don’t want to show on the internet. To get to the next part, I need to click on LAN Setup tab that’s located near the top left of the page and situated between the WAN Setup tab and the Wireless 2.4Ghz tab.
Some devices will be able to connect via 2.4Ghz network and others will connect to a 5.0Ghz network. Ideally, connecting to the 5.0Ghz network is preferable simply due to it being faster. The 2.4Ghz settings are partially visible in the screenshot. It’s enabled. The SSID shows up in lists of networks to connect to if this router is broadcasting the name. The preshared key is the text to type in as the password after one selects the network.
Step 3: LAN Settings
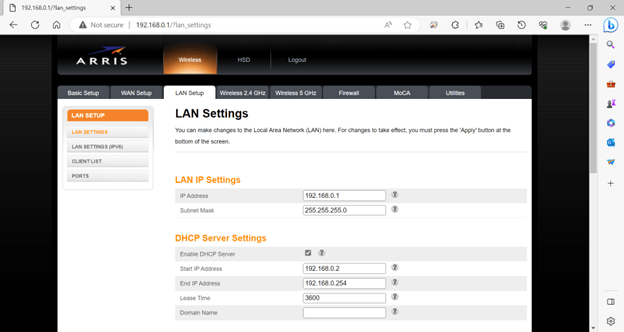
For this Arris router, click on Client List Button to get where one needs to go to reserve IPs and I’ll get to see who’s connected. The Client List button is located near the left of the screen directly between the Lan Settings (IPV6) and the Ports Buttons.
Now for a description of the settings. The IP Address and subnet mask lets me pick the IP the router itself uses as well as its network mask. Notice how the IP the browser is went to is the same as the address in this textbox. The router’s DHCP settings are active, and a range of IP addresses are specified. DHCP or Domain Host Controller Protocol setting lets individual devices just connect to a network and get an IP without needing to configure much. IP addresses assigned via DHCP will typically have an expiration date. When it hits and if the client hasn’t requested a renewal, the specific IP is made available again for other clients.
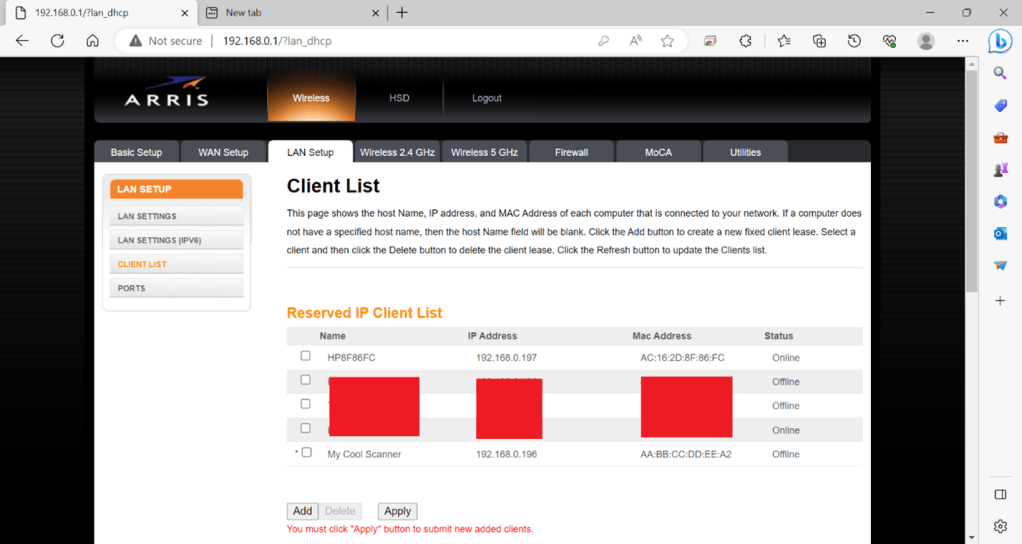
Step 4: Client List
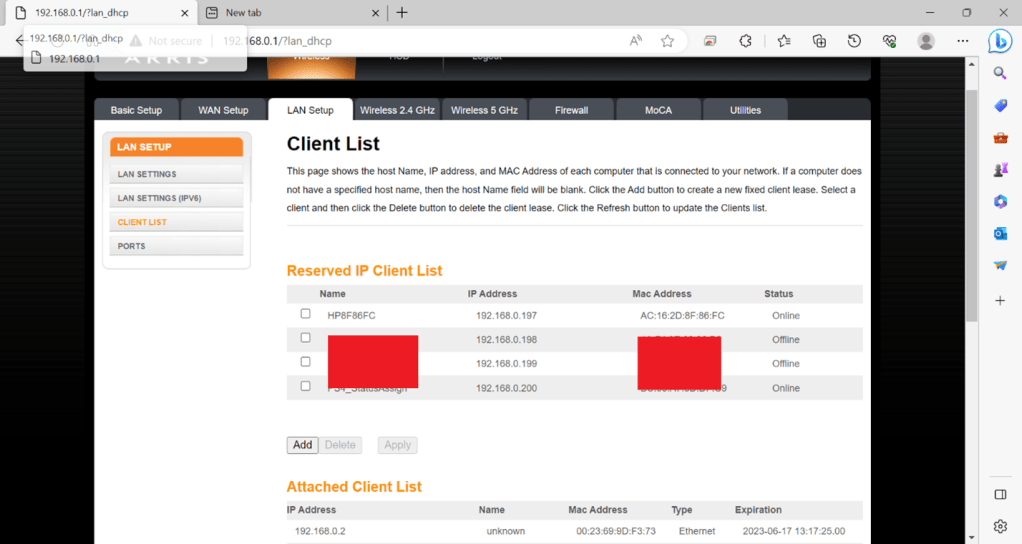
We’ve made to where we can reserve IPs. Hurray! Again, I’ve censored a few things like before that don’t think need to be shared. To add a reserved address, one need to click the Add that’s located at the bottom of the Reserve IP Client List.
For this Arris router, there’s two lists. The first list contains the currently Reserved IPs. The router shows if they’re online and identifies by a Name, IP, and MAC Address. The name and IP are chosen by the user. The MAC address is gotten from the device in question by looking through its settings or checking a manual. One important thing to note is that MAC addresses are typically used to identify machines on a LAN in addition to the IP. Some machines may also let their user change the MAC address.
Step 5: Actually, Entering the Reservation
In the below screenshot, this screen is reached once the Add button is clicked. I’ve already added the info. Note that this Arris router expects the MAC address text to be separated into groups of two with a semi colon between each group. All that’s left for me is to click Add Client located at the bottom of the popup.

Step 6: Confirming the Entry
The IP for the cool scanner is almost added; however, there is one last thing to do. The dot next to the entry called “My Cool Scanner” means it’s not been finalized for the router yet. To do this, click the Apply button located near the Add Button below the list. The router will display a message and it is likely that the login screen will be displayed to request the user login again. Once logged in again, it’s recommended to check if the new entry is finalized. One can do this by getting back to the Client list for the router.
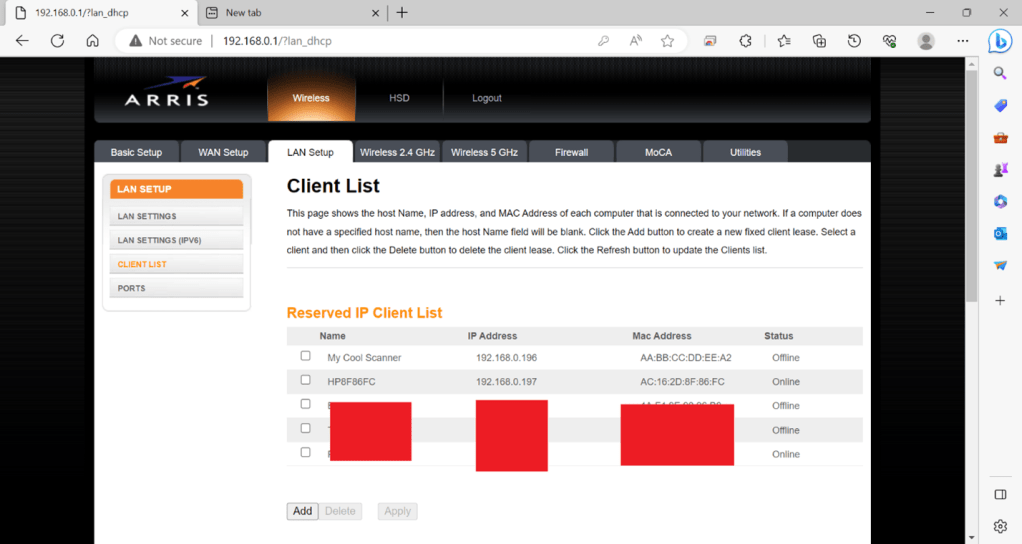
Final Step: Confirming the address was reserved
Hurray! The dot next to “My Cool Scanner” entry is gone. This confirms that the IP reservation was successfully added. Now when my Cool Scanner connects to the network and asks said router for an IP, it will always get this one. To remove the reservation, I’d need to ensure to check the box next to the “My Cool New scanner” entry and hit the delete button next to the add button.
That’s pretty much all that’s needed to reserve an IP for this Arris router. The pathway to do this with other brands of routers is going to be similar. The screens may not match, but you’re going to look for either a way to directly reserve an IP or setting the DHCP to use a range that doesn’t include your IP while staying in the network. Thank you for reading.

Leave a comment